Push the Patient Hard Levels — Dumbbell, Rails, Drops
Break brutal hospital sections with slower speed, smarter swaps, and deliberate practice.
Hard levels are a different game
Early Push the Patient floors teach the joke. Hard floors teach the physics exam. When community players say they are stuck on level 8 or the dumbbell part, they are describing the moment when soft habits stop working. This guide focuses on tough sections—especially the level-8 dumbbell gate, mean rails, and scary drops—plus mindset and duo coordination so you improve instead of looping the same wipe.
Bring fundamentals from Controls, Duo Mode, and Solo Mode. Use the Walkthrough for early structure, How to Beat for ending pacing after the wall falls, and the Tier List when you want a quick “how painful is this?” snapshot.
Mindset before mechanics
Hard sections punish ego. Adopt these rules:
- Speed is a reward for a solved line, not a tool to find the line.
- Three identical wipes means change the plan—role swap, lower speed, or new brake mark.
- Tilt is a mechanic. If you are angry, you will over-push. Take a two-minute break.
- Comedy still helps. The patient does not know where you are going; you can laugh and still play seriously.
Write one sentence before a retry: “This attempt I brake earlier at X.” Single-variable practice beats random hope.
Level 8 and the dumbbell section (community wall)
Players repeatedly call out a dumbbell obstacle on later levels—especially while stuck around level 8. Treat it as a precision gate that ends pride runs, not as a speed check.
Why this wall deletes runs
- The safe corridor is narrower than early hospital halls, so small heading errors clip the weight mass.
- Overspeed shrinks the steerer’s correction window to almost nothing.
- A clean dumbbell clear is often followed by another hazard; celebration speed after the gap causes a second wipe that feels “unfair.”
- Solo players try to push and micro-steer at once; without a full stop, multiplexing fails here first.
Scout phase (no hero pushes)
- Roll up slowly and full stop where you can see the entire dumbbell gap or path.
- Identify the safe corridor—usually narrower than your pride wants to admit. Pick a landmark (floor mark, wall trim, shadow) as your aiming reference.
- Raise camera height so the far side of the gate is visible before you commit.
- In duo, steerer describes the line in five words or fewer; pusher only listens until the line is agreed. Say the plan once: “soft center, brake on clear.”
- In solo, narrate the same plan out loud so you do not “forget” the post-clear brake. See Solo Mode for the full multiplexing rhythm.
Attempt phase (dull on purpose)
- Full stop on the scout mark.
- Square the bed to the corridor.
- Soft push only—no rescue boosts mid-gap.
- Micro-steer; no dramatic swings.
- The instant you clear the weights, brake—then look for the next joke hazard.
A successful dumbbell clear should look boring in a recording. If it looks cinematic, you were probably too fast.
Failure analysis (assign one owner)
- Hit the weight mass? Heading was off—steerer owns the fix (or solo: longer pre-aim stop).
- Fell after a rush? Pusher owned too much speed—move the brake mark earlier and ban full push for the next three attempts.
- Cleared dumbbell, died immediately after? Missing post-clear brake—add “clear—brake” to your callouts.
- Both errors? Swap roles in duo, or drop another speed notch in solo, and retry the creep line.
Do not invent a rocket strategy. Dumbbell clears look dull when done right. When this wall is the only thing between you and a longer clear, fold the win into the pacing plan on How to Beat instead of yeeting into the next segment.
Mini practice loop for level 8
If checkpoints allow, spend a dedicated block on this gate alone:
- 5× scout stops (no commit) until the corridor landmark is automatic.
- 8× soft commits with mandatory post-clear brake.
- 2× “link” attempts into the following pad at the same disciplined speed.
Stop the block if tilt rises. Hard-level skill is a habit you can resume tomorrow.
Precision rails
Late rails combine narrow paths with punishment for oversteer.
Rail protocol
- Stop before the rail starts.
- Camera up; see the exit or next pad.
- Steerer sets heading while fully stopped.
- Pusher applies the lightest push that still moves the bed.
- Steerer corrects in tiny increments.
- Brake before any direction change larger than a few degrees.
- If unstable, stop on the rail if the surface allows—or reverse the plan and retreat to the prior flat if the game geometry permits a safe abort.
Solo rails: Count out loud “brake, aim, soft, correct, brake.” The rhythm replaces a teammate.
Duo rails: Silence except for “brake,” “soft,” and “hold.” Extra chatter causes late inputs.
Huge drops
Drops are less about mid-air magic and more about approach hygiene.
Drop protocol
- Agree on target landing orientation before moving.
- Approach with reduced speed so the lip is not a surprise.
- Square the bed early; last-second twists rarely help.
- Soft to the edge, hold, commit, land, immediate brake.
- Only then look for the next joke hazard.
If you bounce or skid on landing, the mistake was usually pre-lip speed, not “bad luck air control.” Fix the approach.
Themed hard dressing (nursery / morgue)
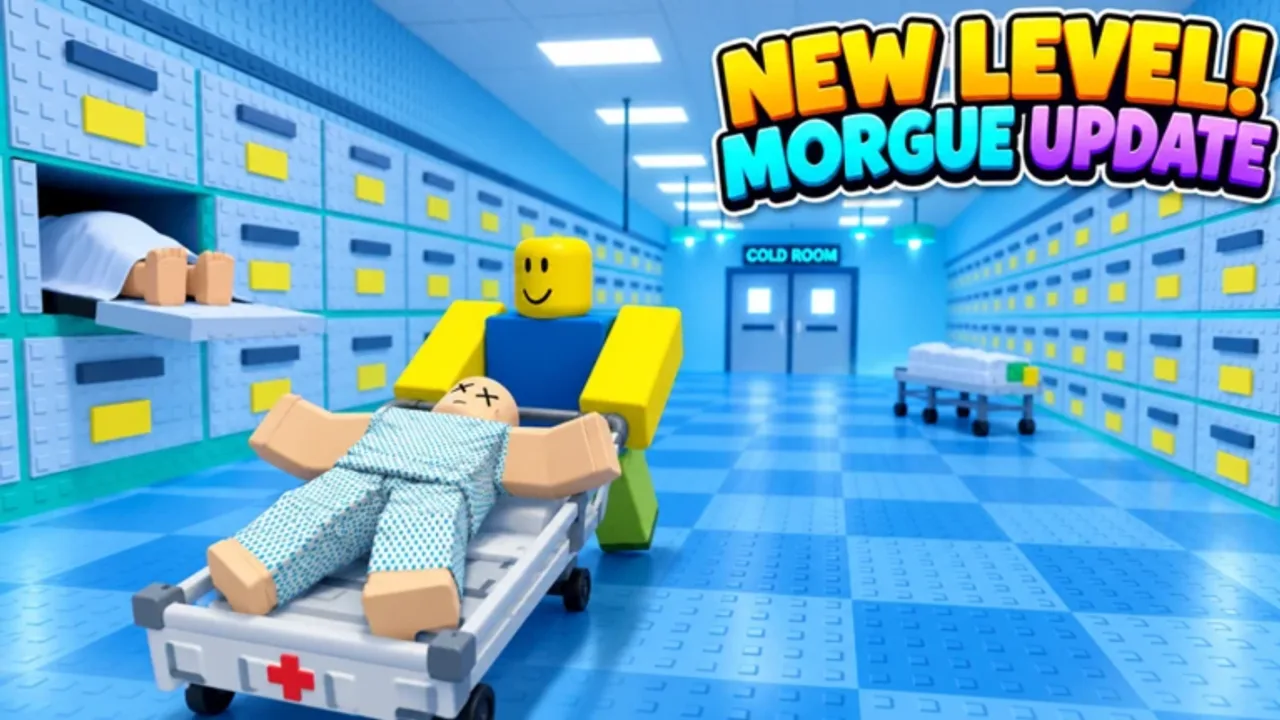
Nursery toys and morgue drawers/gurneys can make hard sections feel newer than they are. Visually noisy props hide the same rail-and-drop logic. Slow down until collision silhouettes make sense, then apply the protocols above. After a Morgue Update session, note whether gurneys act as blockers, ramps, or both on that patch—and adjust brake marks accordingly. Confirm live details on Updates.
Duo coordination for walls
Hard floors are where silent duo dies.
Recommended wall routine
- Wipe once while gathering intel (still try to play clean).
- Stop on safe ground and talk for twenty seconds max.
- Assign one change: speed, line, or roles.
- Attempt twice with that change.
- If still failing, swap roles even if egos resist.
- If still failing, watch a short visual reference, then return at crawl speed.
Put your calmest player on the role that requires the finer motor skill for that obstacle. Some pairs need the clutch steerer on dumbbell; others need the clutch braker. Test; do not assume.
External voice matters more here than on level 1. Remember in-experience voice is not supported—use Discord or a call. Details sit in Duo Mode.
Practice structure that actually works
Spend a session only on the wall segment instead of replaying the entire hospital from spawn if the game’s checkpoints allow focused retries. If you must replay long approaches, treat the approach as warm-up reps for brake timing.
A productive 25-minute block:
- 5 minutes easy corridor warm-up.
- 15 minutes focused wall attempts with notes.
- 5 minutes easy success segment so you end calm.
Ending on a clean easy clear sounds silly; it keeps you willing to return tomorrow.
Solo hard-level advice
Solo hard content is a multiplexing exam. Lower your target speed another notch below what duo pairs use. Prefer full stops over clever mid-course corrections. Consider practicing the same segment after watching a duo clear—copy the pusher’s speed profile even though you also steer. For drills, session goals, and when to stop stubborn solo attempts, open Solo Mode.
What not to do
- Do not hold full push “to get it over with.”
- Do not swap mid-hazard.
- Do not blame only the steerer after a speed-related fall.
- Do not grind for an hour without changing a variable.
- Do not ignore camera reset after crashes; crooked cameras invent new wipes.
- Do not treat a dumbbell clear as permission to sprint the next room.
Linking hard clears back to progression
Once a wall falls, immediately run the next segment at the same disciplined speed. Many teams clear the dumbbell then yeet into the following rail and undo the win. Hard-level skill is a habit, not a single cutscene.
Revisit the Walkthrough if early fundamentals slipped. Use How to Beat to turn a solved wall into ending pacing instead of another pride wipe. Rank remaining pain on the Tier List. Keep role mastery sharp with Pusher Role and Patient Role.
Hard levels are where Push the Patient stops being only a meme and becomes a co-op precision platformer. Brake earlier than your pride wants, steer smaller than your panic wants, and the hospital eventually runs out of ways to drop you.
Frequently Asked Questions
Quick answers for duo runs, codes, updates, and stubborn hospital levels.
Why do so many players get stuck on the level 8 dumbbell part?
It demands precise heading and low speed, then a post-clear brake. Most wipes come from rushing or celebrating early. Scout, soft push, micro-steer, brake after the clear.
Should we swap roles on hard sections?
Yes, after a couple of failed attempts. Matching the steadier player to the needed skill (brake vs steer) often breaks the wall.
Is going slower really faster?
On hard floors, yes. One clean creep clear beats ten full-speed resets that never teach a stable line.
Should I practice hard walls solo or duo?
Either. Solo is great for learning the line; duo helps when you need split brake and steer. See Solo Mode and How to Beat for when to switch.
How do drops differ on late levels?
Punishment for bad approach speed rises. Square early, soft to the lip, land, and brake immediately before the next hazard.