Push the Patient Walkthrough
Tutorial to mid floors: rails, pills, drops, then how to approach later themed hospital chaos.
How to use this walkthrough
Push the Patient is a rolling-bed hospital obby by Myriagone. Levels remix the same verbs—push, brake, steer—across pills, rails, drops, and themed sets. This walkthrough is a level-by-level style guide for the early and mid game, aligned with publicly documented structure (tutorial plus early levels commonly covered in full clear videos), plus honest notes about later content such as nursery toys, morgue drawers/gurneys, and community-famous hard segments like the dumbbell stretch.
We will not invent fake exact prop names beyond what public materials and community discussion support. When a section is unclear, we give principles you can apply on sight.
Play solo or duo. Duo clears are smoother once you know Duo Mode. When a floor feels cruel, jump to Hard Levels and check the Tier List for pain rankings.
Before you start
- Warm up push/brake/steer using Controls.
- Decide solo vs duo for this session.
- Keep average speed low until a line is proven.
- After updates (Nursery, Morgue, and future drops), re-check Updates—new floors can appear after the classic early set.
Tutorial — basic mechanics
Goal: Leave the tutorial owning the three verbs without panic.
Plan:
- Practice a full stop on flat ground.
- Soft-push in a straight line, then brake before a marked turn.
- Steer with small corrections only.
- If duo, swap once on flat ground and re-center cameras.
Fail pattern: Skipping the tutorial and discovering brakes mid-rail on level 1.
Success check: You can stop the bed where you intend, not where gravity intends.
Level 1 — first real hospital pressure
Level 1 introduces the joke and the stakes: the bed is rolling, the patient is confused, and the environment starts adding pills and simple rail ideas.
Plan:
- Exit the safe spawn with a soft push only.
- Treat every pill cluster as a reason to slow down, not a slalom challenge.
- If a short rail appears, stop before entry, align, then creep.
- Prefer boring clears over stylish near-misses.
Duo tip: Pusher narrates “soft” and “brake.” Steerer stays quiet unless a heading change is needed.
Solo tip: Sequence brake → steer → push on every decision point.
Common wipe: Holding full push because the level still “looks easy.”
Level 2 — obstacles stack
Level 2 typically raises obstacle density: more path breaks, more reasons to mismanage speed, and longer stretches where a single mistake resets progress.
Plan:
- Mentally split the level into segments between flat recovery pads.
- Clear one segment at a time; do not chain full speed across unknown corners.
- On rails, enter slow, exit slower.
- After any scary near miss, full stop and reset heading before continuing.
Duo tip: If you wipe twice on the same segment, swap roles once before the third try.
Watch-for: Late steering while the pusher is still accelerating—desync crashes.
Level 3 — challenges tighten
By level 3, the course expects you to combine skills: approach a drop with controlled speed, land, then immediately handle a rail or clutter without celebrating early.
Plan:
- For drops: agree on approach speed, square the bed, soft to the lip, hold, land, brake.
- For chained hazards: identify the first brake point out loud (duo) or mark it visually (solo).
- Never steer hard in the last half-second before a lip—fix heading earlier.
Duo tip: Pusher owns the drop speech; steerer confirms “square” before the push to the lip.
Mindset: Level 3 punishes victory-lap brain. Stay in checklist mode until the exit is truly behind you.
Level 4 — mid-early boss energy
Level 4 (as covered in common full-clear videos) often feels like the first “we need a real plan” floor. Expect longer rails, meaner drops, or combinations that erase careless speed.
Plan:
- Scout with your eyes—camera up, look ahead—before committing push.
- Clear in halves if needed: reach a midpoint safe flat, stop, breathe, continue.
- Use soft pushes exclusively until the final clean runway.
- If duo communication gets messy, pause on flat ground and reset vocabulary.
Duo tip: Put your steadiest player on the role that failed last attempt.
Solo tip: Accept a slower clear time; memorization comes from finished attempts, not heroic fails.
After level 4, many players feel ready to rush. Do not. The hospital only gets weirder.
Mid game principles (levels beyond the early set)
Public clear videos and live ops show the game continuing past the opening four with more hospital chaos. Exact layouts shift with updates, so use these universal rules:
- New geometry, same verbs. If you can push, brake, and steer under pressure, you can learn a new floor.
- Stop on first sight of unfamiliar props. Nursery toys or morgue gurneys are readable once you slow down enough to see collision boxes.
- One new trick per retry. Change speed, or role, or line—not all three at once—so you know what worked.
- Bookmark pain. When a segment feels unfair, note it and later cross-check Hard Levels and the Tier List.
Themed later content — nursery and morgue
Nursery-style floors
Event and community notes describe nursery zones with giant baby toys and playful oversized props. Toys create awkward sightlines and odd bounce potential. Treat them like colorful versions of pill clutter: slow in, pick a lane, do not ricochet on purpose.
Morgue Update floors
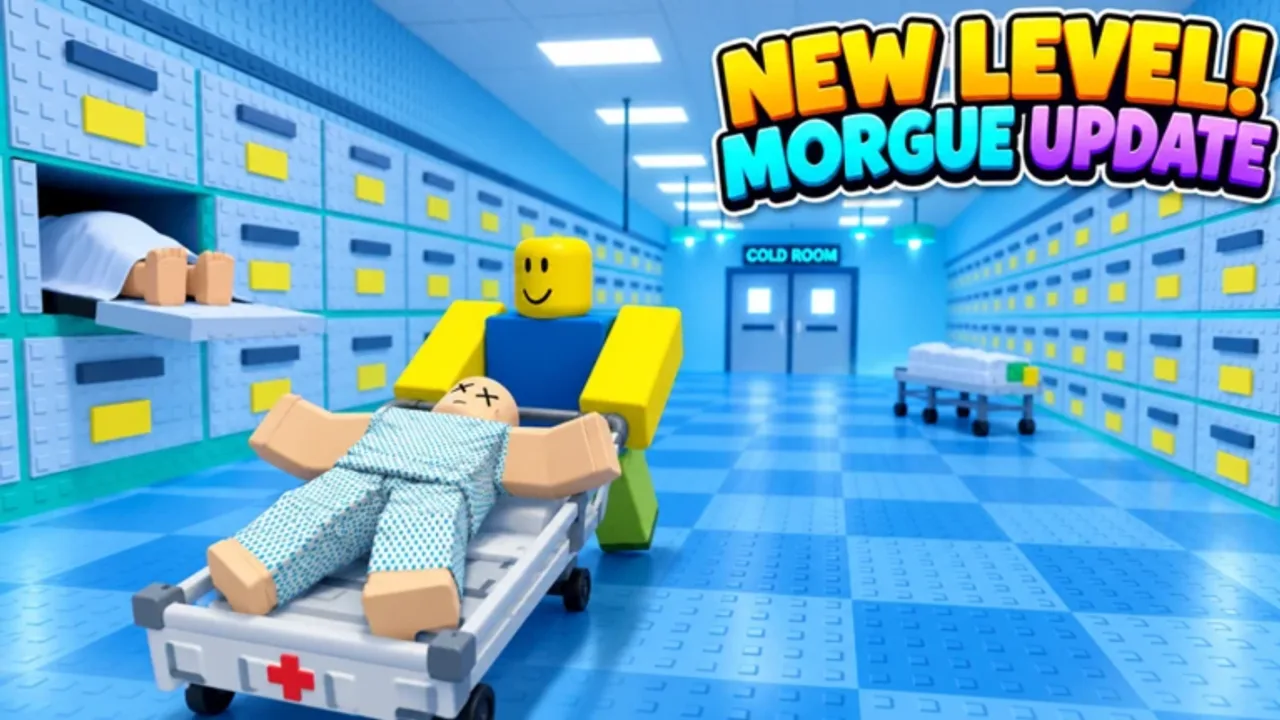
The Morgue Update challenges players to guide the patient past body drawers and gurneys toward a cold-room style destination without dropping the bed. Gurneys and drawers are environmental storytelling and collision hazards. Approach like rails-plus-clutter: early brakes, square heading, no mid-hazard swaps.
Because live events rotate, confirm what is currently active on Updates and the Roblox place page before assuming a floor order.
Later hard spikes (including dumbbell talk)
Community comments frequently call out level 8 and a dumbbell section as a wall. Without spoiling a fake pixel-perfect route that may patch, use this approach:
- Arrive with low speed and a pre-agreed duo plan.
- Study the dumbbell obstacle’s safe corridor before any full push.
- Prefer multiple creep attempts over one heroic launch.
- Swap roles if steer precision or brake timing is the real blocker.
- Read Hard Levels for mindset and practice structure.
If creators release newer all-levels videos after major patches, use them as visual supplements—but keep your own brake discipline.
Solo walkthrough notes
Solo clears are absolutely possible. Budget more time for mid floors. Your “duo partner” is a strict personal checklist: brake marks, soft pushes, and refusing to steer at max speed. When stuck, watch a segment, then recreate it at 70% speed.
Duo walkthrough notes
Assign a default: experienced pusher for new floors, swap for known precision steer mazes. After each clear, spend thirty seconds on “what almost killed us?” That review prevents repeating almost-wipes as real wipes next session.
Suggested progress path
- Tutorial + Level 1–2 for mechanics.
- Level 3–4 for combined hazards.
- Mid floors with themed props as updates add them.
- Hard spikes (dumbbell and friends) with dedicated practice.
- Revisit older floors faster for fun or content—speed is a reward, not an entry tax.
Related reading
- Hard Levels — tough section tactics.
- Duo Mode — coordination playbook.
- Tier List — relative difficulty snapshots.
- Getting Started — day-one framing.
Clear the early hospital with patience, then let the later morgue drawers and nursery toys try—and fail—to break the habits you built on levels 1 through 4.
Frequently Asked Questions
Quick answers for duo runs, codes, updates, and stubborn hospital levels.
Does this walkthrough cover every level after updates?
It focuses on tutorial through early mid structure and principles for later themed floors. Check Updates after Nursery or Morgue patches for new layout notes.
Can I follow this walkthrough in solo?
Yes. Use the same brake-first plans; expect slower clears when you must multiplex push and steer alone.
What is the dumbbell section?
A commonly cited later-level precision obstacle (often mentioned around level 8). Approach slow, study the safe line, and see the Hard Levels guide.
Should I watch a video while playing?
Use a real walkthrough video for visual routes, then replay segments yourself at lower speed so inputs stick.
Where do nursery and morgue fit?
They are themed later additions with toys or drawers/gurneys. Apply the same push, brake, and steer rules with extra caution on new collisions.